Copyright Protection

Protected by Copyscape DMCA Takedown Notice Infringement Search Tool All content, including text and original photos are copyrighted and are property of the blog author, Julie Johnson
Showing posts with label holiday. Show all posts

Tuesday, January 13, 2015

LOG CABIN COWS

HAPPY NEW YEAR 2015!

A lovely holiday season with such good memories:


Market Bags made from my otherwise discarded rice bags


Concluding 2014...

These bags are too lovely to throw!
I participated in a Holiday Art Faire in another artist's home at the beginning of December and I made some money (so I can resupply!). I found customers and other artists at the Faire most interested in: 3-dimensional houses, market bags, holiday-themed coasters, wall decor, homemade ornaments, a prize-winning red and white tablerunner, and machine-embroidered hand towels.

After the Faire, I've continued English paper-piecing hexagons and other shapes (an easy activity to travel with and I find hand-sewing calming).

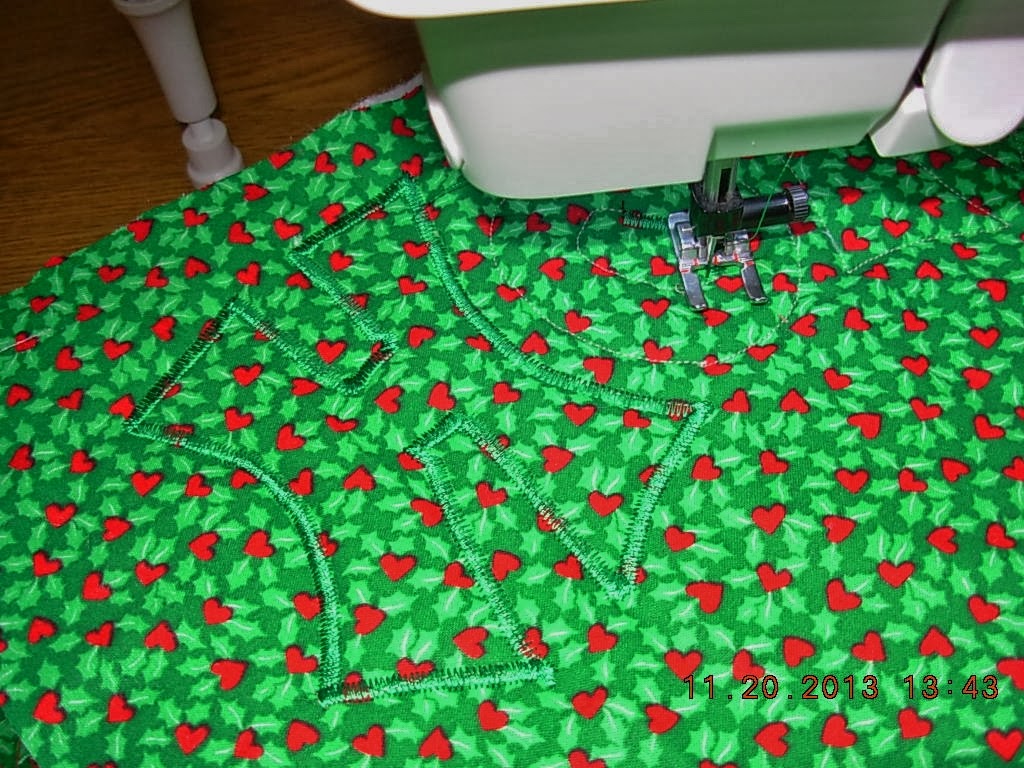
One of my current goals in the next few months is to bring some quilts to completion. I added another border to my heart quilt and would like to quilt it on a longarm machine if I can find one to use. I have at least 3 other quilts of various sizes to complete.

Log Cabin Cows

My neighbor, knowing that I like to quilt, offered me some of her fabric scraps a few years ago. Some are probably about 30 years old because they are obviously children's prints from years gone by. The motifs of a few of the fabrics inspired me to combine them. I fussy cut the farm animals, in this case, cows, featured in the center of the log cabin block (surrounding fabrics: red with tiny white dots, black with white "cow" spots), each one being a little wonky at 1.75"x 1.75" (more or less):


Log Cabin block with fussy-cut wonky cow centers measuring about 10" finished
When I put all the blocks together, I have fun combinations like these:


I've run out of the feature fabric in the center, so I had to "cheat" or improvise on 2 blocks by using a plain blue square of fabric in the center so I would have an even twelve 10" blocks. I think they're cute and I love the many patterns log cabin blocks can make. These are not quilt-quality fabrics, but they'll have to do. I'm a bit worried about the red fabric running in the wash someday. I might presoak the blocks in vinegar to set the colors.

Happy creating!

Connecting with friends like you via:

Sew Fresh Quilts        AND     WIP Wednesday at Freshly Pieced   AND    Quilting is more fun than Housework

Wednesday, November 19, 2014

Three Dimensional Art Quilts

I enjoy looking at quilt magazines. I purchase older issues (from the year 2000 and above, because they're cheaper!) when I can find them. I especially enjoy the Quilting Arts Magazine.

In the December 2013/January 2014 issue, I found "fabric houses with an art-quilt flare" by Jacqueline deRuyter that I knew I'd enjoy making sometime in the future. For the last two weeks, I've been making progress:
I like the little random thread ends "flying" at the peak of the roofs.
Photo
Whimsical and perfect for winter
     Photo             

These are constructed with layers of fabric scraps that I've been saving, including ones that measure barely an 1/8"! They are placed on a panel of firm stabilizer (I used Peltex 71X by Pellon) and quitled well with an Aurofil cotton thread. I used Rit dye for the first 2 darker houses per her suggestion. I suppose this causes the melange of fabrics to share an overall color theme. I decided to skip the dying process on the next 2 houses, and changed the dimensions slightly on another to make it shorter and a bit wider. Once they were decorated with more bits of fabric scraps, beads, buttons and ribbons, I sewed their sides together and stuffed them with polyester, sewing the closing flap at the bottom with hand embroidery. As you can imagine, these can be further embellished in more or other ways: paints, stencils, inks, stamps, threads, yarn, etc.

Each measures about 2.5-3" wide, about 8-10" tall,.

They're fun! I hope to keep adding to this village and make them one feature at the Holiday Art Faire in December (see my previous post on November 14).

I'm also quilting and binding more table runners and trying to decide what to do with some blocks that haven't been assigned to anything yet. I may also complete a handbag or two before Dec. 5.

HAPPY CREATING!

Linking up with:

WIP Wednesday at Freshly Pieced                 Sew Fresh Quilts                    Modern Tradition Quilts


.


AN UPDATE FROM HOLIDAY ART FAIRE

I only had time to complete these 4 housese shown before the Faire. I am thrilled that all 4 sold! I look forward to making more cuz I JUST LIKE THEM :) All 5 of my market bags sold, as well as some of my homespun tree ornaments. Holiday themed coasters were winners. A woman purchased my County Fair 1st place winning table runner and told me it would immediately replace the Christmas runner on her table at home. Several other items sold as well. I am glad some of my creations found new homes. 

Friday, November 14, 2014

Holiday Art Faire invitation!

I'm excited! I received an invitation to be the only Quilter featured at this event, and if you'll be in the area, you're invited!

My table runner is on the right with a felted cap upon it (I didn't mock-up this postcard, ha! ha!)

Here's how to find it:


By all means, please let me know if you'll be coming. I won't be present during the entire event, but if I am there, I'd love to meet you!

Items I'll be featuring:
  • Table runners, table toppers
  • Placemats
  • Tea Cozies
  • Gift bags for wine bottles
  • Gift tags
  • Recycled Rice bags-turned-shopping-bags
  • Oven mitts
  • Shopping or Market bags
  • Coasters & Mug Rugs
  • String bags
  • And more!

Saturday, November 30, 2013

Ho-Ho-Ho Garland Finished

You may remember my former posts, on Nov. 19 when I exhibit the results of drinking a mocha & visiting a shop of STUFF and begin making a banner or garland for the holidays. On Nov. 21, I posted a tutorial on how to make the fabric letters. Yesterday, the day after a wonderful Thanksgiving meal and conversation with our daughter and friends, we watched a university football game fraught with rivalry (the University of Oregon "Ducks", our family's team, versus the Oregon State University "Beavers", my sister's family's team). The incredible game kept us on the edge of our seats till the very end, when our team won in the final seconds, 36-35!!! What's this got to do with the garland?, you may ask. My dear husband set up a card table so I could finish its design and bring this fun project to completion so it could be hung on our front door before Christmas. I spread all the ingredients I'd collected on the table including scissors, wire cutters (for the canvas ribbon used as the base), thread, needles and pins.

 I love the result!
 Now when we open the front door, it's fun to hear the tinkle of the 4 green and red bells.
Bells, fake holly & berries, ribbons, and ornaments.

I found this cute Santa at a thrift store & gave him a new home.
If you make something like this, please share it. 
I enjoy seeing what others create!

Thursday, November 21, 2013

HOW TO MAKE “HO HO HO” GARLAND or BANNER: A tutorial **

Dress up your holiday!
Skill level: Easy!
Supplies:
  •          (2) ¼ yd. or more fabrics of choice, 1 for back, 1 for top (if you want the letters to be reversible, think about this!)
  •          Lofty acrylic batting/wadding
  •          Temporary Spray Adhesive (I used Sulky KK2000)
  •          Glad Press’n Seal
  •          Sharp Pinking or other fancy edge scissors or rotary cutter
  •          Paper cutting scissors or craft razor blade
  •          Paper
  •          Pencil
  •          Marking Pen (to mark on Glad Press’n Seal)
  •          Utility thread
  •          Decorative thread in top & bobbin
  •          Other decorative items of your choice: ribbon, candy canes (real or fake), ornaments, tinsel, etc.
  •          Something by which to hang the letters, eg, O-ring, fabric, craft board, etc.

Making the stencils:

    1. .       Draw your letters to make stencils—I did mine freehand (the 'H' measures about 4"x5"; the 'O' measures about 3"x3").  You could also use the computer for choosing fonts: select a font that will give you a block style from which to make a stencil and print. Cut out with craft scissors or razor blade. (If you’re really confident, skip this step and go to step 2 directly.)

      2.       Place your cut-outs (or do your freehand) on a piece of cardboard or template plastic. Draw around the stencil with a pencil or pen. Cut out with craft scissors or razor blade.
                  
Making the "fabric sandwich":
  1. If you’ll be using the adhesive spray product, I recommend that you do it in the lid of a cardboard box, or take it outside so that any overspray will not affect other surfaces or cause problems with fumes. I used a box lid.
  2. On your chosen surface, place and smooth out the backing fabric wrong-side up. Spritz with adhesive quickly across the fabric or in bursts—not necessary to use much, so watch your trigger finger.
  3. Place and smooth out the batting/wadding on top of sprayed wrong-side of backing fabric. (I used a raggy scrap of batting.)
  4. Place top fabric wrong-side up on top of the batting, smooth out and spritz. Turn over and place on top of batting. Take out of box, or return inside and smooth out.
  5. Pull out a small sheet of Glad Press’n Seal that will cover the fabric surface that you will be stenciling. Note that the Glad Press’n Seal is bumpy and sticky on one side (easy-to-remove sticky). Place this on the surface of the fabric and smooth out with your hands. 
    Product placement?? (LOL)
Stenciling Fabric and Stitching:
  1. Place your stencils on top of the “fabric sandwich” you just created. Leave at least ½” or more between letters as you will be leaving a ragged but decorative edge when you cut them out. (Stencils should be on top of the Glad Press’n Seal.) Using a marker, draw around your letters. Don’t be too fussy. They’re supposed to looked folksy or homemade.
    Tracing the letters onto plastic wrap.
  2. Set your straight stitch length to about “2” for closer stitches (makes the Glad Press’n Seal easier to remove like perforated paper). With utility thread in your machine (top & bobbin threads), stitch around your drawings. Cut threads between letters. Be sure to stitch around the inside circle of the ‘O’s as well.
  3. When you've done all this initial stitching, pull away all the Glad Press’n Seal. You don’t need it any more. If some little bits are left behind, they’ll be covered up by the decorative stitching in the next step.
    Removing plastic wrap
  4.  I chose to use a zigzag stitch with my open applique foot to finish the edges. I set the default width of the stitch smaller. You may need to adjust the length of the stitch as well so that it is close. I also selected to have auto-knot & -snip for any time I completed the stitching on a letter. My applique foot has a center mark that I could use to aim my stitching as I sewed around all edges. I paid attention to corners of the letters to make sure they were covered with thread as well.
Zigzag stitching
Zigzag stitching complete
Finish Work:
  1. Use pinking shears or other edge trimmers for cutting out the letters, being careful not to decorative stitching. If you do snip some of the stitching, go back over it in those spots.
    Snip close to stitching, but don't clip stitching!

  2. Snip any thread ends.
  3. Place on a background of your choice. This could be a ribbon, fabric, craft board in a vertical, horizontal or diagonal position. Decide how you’d like to adhere it to the surface and how it will hang once it’s put together. It could be stitched (by hand or machine), glued, Velcro-ed, etc. Decorate your garland or banner with ornaments, candies, ribbons, bells, buttons, tinsel, etc. Add some cheer to your walls, mantle, shelf, door, etc. Have fun!
    I haven't finished mine, but here's my idea.
    Finished size is at least 4" x 24".

    **As a bonus, I'd like to have you email me if you make one yourself! I'd love to feature them on my blog. When you finish, take a good photo, and Google+ the photo to me, along with your name and/or blog name. I can't wait to see what you do!

Tuesday, November 19, 2013

A stop at a local shop bursting with stimulation & inspiration, add an iced coffee mocha and... 

the Rest is History…

There’s a small shop in town that specializes in cramming every bit of its space with (new) STUFF. I used to enjoy going into this store while attending university. In fact, this type of small shop reminds me of browsing and shopping in Japan. I loved it! Real estate is very expensive in Japan, so making a space, however small, profitable is important. In fact, many of the shops are truly storefronts with their small personal living space behind a curtain at the back. It’s not unusual to find the shopkeeper watching tv, cooking for the family or doing other household tasks when I came by. I would peruse the space like a detective so I wouldn’t miss any nook or cranny. I had a fascination with all the items, some unfamiliar and curious. In any case, it’d been a long time since I’d stopped at this local shop, so after “visiting” the dentist (argh!) and being on that end of town, I decided to “reward” myself (ever do this??) and venture in, just for a little look. An hour later…

After returning home and eating lunch, I enjoyed an iced mocha at 2pm. I make it a habit, for my health, to take a daily rest, usually by 2pm but I didn't get to it early enough today. As I shut my eyes, it swiftly became apparent that actual sleep wouldn't be happening, no matter how long I lay there. Images flooded my head. My mind took flights of fancy, envisioning sewing and art endeavors that put a smile on my face. Excitement increased as each image and idea fled by, and I knew I was swamped…wrong beverage to drink at 2pm! So I gave up.

This is one idea I had today, and I will designate it as my project for "Works in Progress" Wednesday:

A seasonal banner

Close-up
I envision this little banner to be capable of hanging on a wall, a mantle, a shelf…wherever someone wants to add holiday cheer! 
So I’m still working out the details. 
What flights of fancy have come to you lately?
WIP Wednesday at Freshly Pieced