Copyright Protection

Protected by Copyscape DMCA Takedown Notice Infringement Search Tool All content, including text and original photos are copyrighted and are property of the blog author, Julie Johnson

Wednesday, April 30, 2014

iPad Bag Made & Delivered!

iPad Bag

In a previous post (January 19, 2014) I featured some shoulder sling bags that I'd made with Pattern #1201 "Flip Flap Bag" by Whistlepig Creek Productions. I showed a friend the bag, and he immediately said, "An iPad bag!! That's exactly what I need! Would you make me one?" Who was I to refuse a man with a great idea?!
"Flip Flap" Sling Shoulder Bag
Under the two top flaps are hidden pockets.
Lifting the top curved flap reveals the first hidden pocket.
Both hidden pockets accommodate smart phones easily.
When the phone is inside the pocket, it doesn't show,
while the pocket is shallow enough to allow easy access.


He picked out fabrics from my stash, favoring colors like blacks and grays. The bag calls for 4 different fabrics, and while it states that it's "Fat Quarter Friendly", I beg to differ. I highly recommend that when a pattern claims this, don't believe it! You'll need just a bit more, you can bank on it. Many fat quarters include the selvage, which subtracts from some of the precious inches needed for the project. Then I found the instructions are brief and confusing, and I'm not new to sewing!!

But I digress....   
Lift up the second triangular flap & find another nice hidden pocket for a cell phone or such. This pocket shares the hidden feature and easy access depth of the first pocket.

I finally finished his bag! In spite of my qualms with the aforementioned inadequacies of the pattern, I really like this design. It's fun to put together (once you understand it!), and the design works well. It features 2 hidden pockets, which perfectly accommodate Smart Phones and other items, like a wallet. The main bag generously accepts an iPad or similar tablet/notebook with room to spare. There's 2 more pockets inside the main bag as well as room for other items, such as notebooks, books, wallet, etc. Before adding these gizmos, the bag itself is very light. The wearer decides how much weight to carry! I love the shoulder sling strap which is adjustable: knot it as a fashion statement and/or to shorten its length whenever needed.  
Proudly modeling the main bag area that holds the iPad.
Note the "Domo" character decorating the back of his iPad,
matching his stuffed toy.

For his bag, I chose not to add decorative top-stitching or add a button as an ornament (the bag needs no closure) as I had done on my previous bags, which were for my personal use. "Closing" the bag is simple: flip the cover over. You can mix and match fabrics that fit your mood. I suggest making several, for all occasions. Why stop at one?? I estimate that it takes at least half a day for total assembly, but plan longer for the first time you make it.
Interior pockets in the body of the bag (he chose the colors!).
Modeling the bag: lightweight & secure.
The long strap allows it to be slung over the shoulder
so that one's arm covers the top of the entire bag
when the arm is at one's side.
Notice that  the iPad nor the cell phone can't be seen.


Quilt Label

I also machine embroidered another quilt label for my niece Aubrey. She asked for one with a larger font than the one I'd originally made the previous week.
Label measures 5" x 5" and includes a 1" border for attachment to quilt.

I'm happily linking up with buddies like you at:
WIP Wednesday at Freshly Pieced     and  Sew Fresh Quilts


Wednesday, April 23, 2014

Spring Carrots & More Quilt Labels

 Jenny Doan of the Missouri Star Quilting Company 
is one of my favorite people online. 
Check out these cute spring carrots that I made over the weekend:


Close up of carrot on a cute chick tablerunner made by my sister, Diana, of SewCraftyChick.blogspot.com
  
My dining table decorations.
If you'd like to make some simple carrots, too, here's the demo on YouTube: 
(I admit that I didn't use the wedge template. 
I made my own wedge from paper. I just estimated, & you can, too!)

Thursday, April 17, 2014

Applique Garden

I don't have enough projects to fill my time--HA, HA, HA--so I decided to do another "mystery" wall-hanging sponsored by Susan Claire in Australia of Gourmet Quilter. She's refreshing and offers many free tutorials on YouTube. Her slogan: "...because quilting is delicious!" I like her spirit!

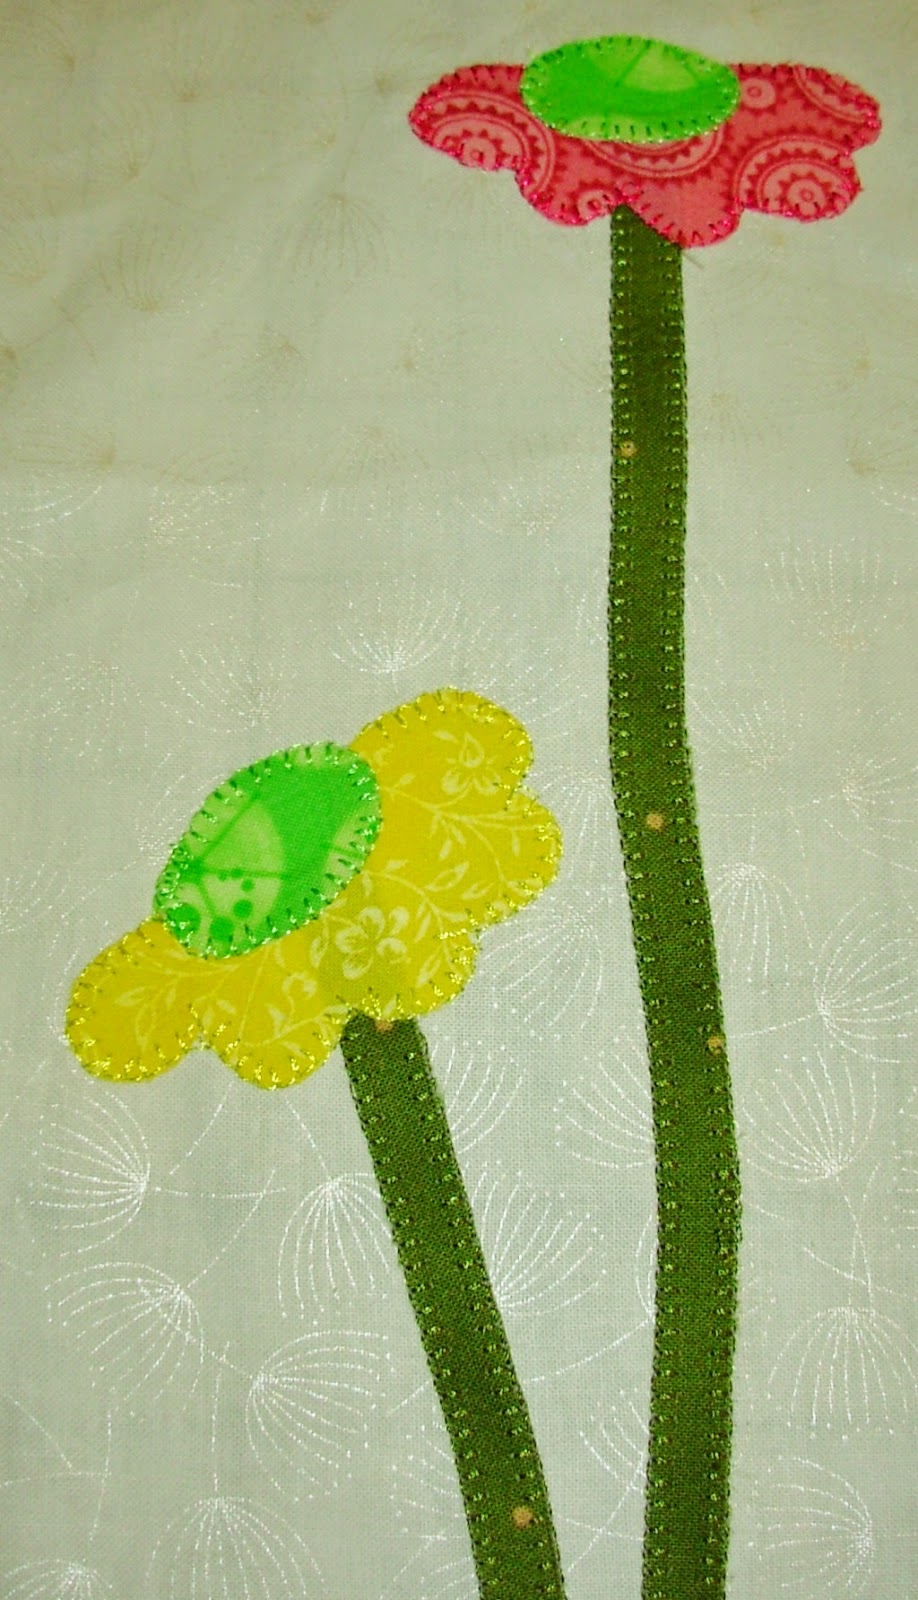
Each month she's sponsoring a free mystery piece of the Garden wall hanging, which started in March. I've just finished March's panel:

This first panel is about 42" in length.


Topmost flowers.
Long stems.

Butterfly at the top.

Flower and leaf.
I love the background white on white fabric--nice find for a nature theme. I've been using scraps of fabric as I go along. This project gives me an opportunity to work with my machine's blanket stitch, and since she's "revealing" each month, it helps me to pace myself.

If you'd like to join the fun, Susan offers the pattern for a small fee on her website for any of the months you've missed which is only March at this point.


Happy creating!

Wednesday, April 16, 2014

Sweet, Unique Star Blocks and Labels

I'm working on the fourth installment of the Mystery Quilt sponsored by Eleanor Burns. Each installment has included different types of stars. She uses techniques that help me quilt more accurately. I think you'll agree that these fabrics from a fabric line called "In the Beginning" make it sparkle. I'm using yellow toned "Architextures" by Carolyn Friedlander for Robert Kaufman fabrics as a background. I threw in other fabrics from Michael Miller, Clothworks, more Robert Kaufmans, and some I can't identify now.
Two of four stars, which will be joined by background triangles and another large scale green fabric triangles to become the corner squares of the borders.

Close up of Mystery Star 4

On my design wall, four different stars. 
These new stars are not in their corner spot yet because my design wall is too small.

My sister, Diana of SewCraftyChick.blogspot.com asked me to machine embroider another label. She is an ACTIVE quilter! I can't keep up with her, and she works full time, raises kids, and cares for pets!! I always collaborate with the individual requesting the label concerning colors, label size, motifs, fonts, etc. I'm able to send screen shots via the internet during the design process so that modifications can be made before stitching it out.


The label looked like this on the computer screen. Diana asked for bright thread colors and the butterfly motif to match her fabrics.


The finished label, measuring about 4.5" x 4.5" (note: I'm still snipping threads that connect the design on the front). I always leave an additional half inch or more around the label for the seamstress to trim and attach with their chosen method. As I stitched this out, I decided against the black thread for the script. It seemed too severe among these lively colors.

Other labels I've designed:


Designs can also include appliques, as seen of the Snow-girl on the left. 


Stitched out on selected fabric.


Screen Shot of Label


Screen Shot of Label

I've made and designed others as well, in various sizes. If you would like to order one, feel free to collaborate with me. It's a nice addition to whatever you're making, and so important to document the work.

Linking up with friends at: 
WIP Wednesday at Freshly Pieced                                              Sew Fresh Quilts


Wednesday, April 9, 2014

Be Liberated! Go Wonky with a Star

A Wonky Star Block: note the uneven/unequal rays of the star points.

I began attending my local "chapter" of a Modern Quilt Guild in January this year. If you have an opportunity to be part of a guild, club, class, you'll be inspired like I am! I love seeing what people produce! Each month some members of the guild are participating in a "quilting bee exchange" in which we make blocks for one another according to the designated "queen bee's" instructions. For the Queen Bee of March, I made this star block yesterday which I'll be returning to her at tonight's meeting. Each of her blocks will be different color themes. She asked us to select fabrics from our stash according to the particular colorway of the fabric swatch she'd attached to each individual bag, in which she also included fabric bits for the wonky star's parts and 2 yummy pieces of chocolate. Great idea!
Notice how the seams are ironed on the back to interlock & reduce bulk.

Wonky stars, and other wonky patterns, are simple to make. They liberate the quilter, regardless of his/her level of experience, from the worry of matching points, being exact, and all the other "rules" that can intimidate us. My goal is to have fun and be creative by sewing something to enjoy as art; to inspire, soothe or create passion in a room; to grace a table as a runner or place-mat; to "garnish" my life and the lives of others in any number of ways: potholders, mug rugs, apron, jacket, handbag, and so much more! Let's not let the details get in our way. :-)


For tutorials on how to construct this block:
  1. See Kat's instructions: http://flutterkat.com/2012/01/reverse-rainbow-starburst-block/
  2. If you haven't discovered Jenny (specializing in fast, easy, and fun quilting) of the Missouri Star Quilt Company, you need to! See lots of incredible tutorials on their website, and her goal is usually. Here's her: Wonky Star Charm Pack Quilt
The block I constructed used 3.5" squares and finishes at 15.25". It wouldn't take long to produce and enjoy a quilt made with these delightful, liberating stars!

Linking up with friends at:
WIP Wednesday at Freshly Pieced                   AND                      Sew Fresh Quilts

Wednesday, April 2, 2014

Marriage Proposal, Engagement, Pillowcases!

Great News!

Our sweet-pea of a daughter became engaged to a lovely young man on March 9. Her fiance invited us to the after-event to surprise her. She had no idea all the plans he made to bring this about! Bobby graciously talked with my husband, her dad, to ask his "permission" to marry her a couple of weeks before the party at his parents' home.

So this called for something handmade, don't you think? I decided that I could do pillowcases in a week's time. It took a week to think about, plan, purchase more fabric :-), print a photo on fabric for the first time!, and then fit it all together. We're all on nice, happy new adventures!

I started with this lovely photo.


I printed it onto fabric prepared for inkjet printing.


And here are the results! Each gets their own pillowcase, to dream about one another, and when they come together in marriage, they have a set.

Now I may have to come up with a very special quilt. I have until late December, apparently.

I'm linking with "WIP Wednesday" with Lee at FreshlyPieced, and "Let's Bee Social" with Lorna at SewFreshQuilts.
Sew Fresh Quilts                                                                          WIP Wednesday at Freshly Pieced